Football season is here again and that means the cold winter months are just around the corner. One of my favorite things to do in the winter is to snuggle up on the sofa with a warm fuzzy blanket. My son has also adopted this habit of mine so we’ve collected quite a stack of warm blankets in our living room. Why so many? We have two dogs and two cats so most of the time half of the blankets are in the laundry waiting to be de-furred!
In my search for the perfect cuddly blanket, I discovered no-sew fleece tie blankets. They are the perfect blanket to snuggle under when those cold days hit and they are super easy to make. I can finish a large one off in about an hour (while watching TV) and a small one in even less time. They make great baby or toddler gifts, and would also be a great craft project for kids to do on a snow day.
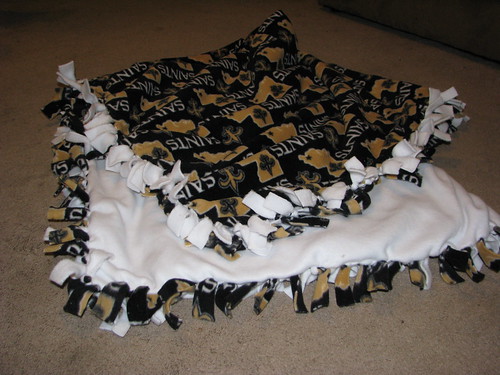
The best part is you can find fleece in so many different patterns that you can easily customize them for that special person. My favorite is my Boston Red Sox blanket. My son loves his Cars blanket. And my husband? He’s about to get his hands on a brand new New Orleans Saints blanket to keep him warm while he hollers at the TV this season.
Here’s what you’ll need:
2 pieces of coordinating fleece fabric (1-2 yards of each depending on size you want)
scissors (or rotary cutter and cutting board)
Seriously, that’s it. If you are obsessive about straight, even lines then you may want a tape measure or yard stick to help but I just go for it and they always look fine.
Here’s what you do:
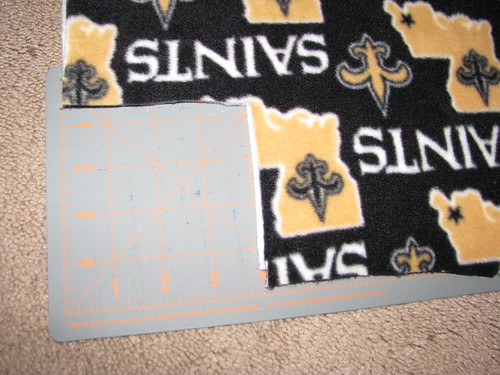
Lay the two pieces of fleece out flat with wrong sides facing. Cut fleece to preferred size. I generally use 1yard for a baby blanket, 1 1/2 yards for a toddler/child blanket, or 2 yards for a teen/adult blanket. Keep in mind that you will reduce the size by 3-4 inches in all directions when you do the ties. Trim edges so that they are even.
Cut a 3-4 inch square through both pieces of fabric in each corner and discard. If you want the ties shorter do about 3 inches. If you want them longer you can go 4 inches (or however long you want them to be). Be aware that the fleece stretches a bit in one direction and not the other. If you make shorter cuts you may want to cut a bit longer on the non-stretchy side.
Next, cut the strips for your ties. Again, cut through both pieces of fabric. Cut each edge into 1 inch wide strips, 3-4 inches long.
After you are done cutting (and your hand stops cramping) start tying the two pieces of fabric together (one strip from each fabric). I do double knots to keep it from coming apart in the wash. Some suggest tying every other strip, then flipping the blanket over and tying the remaining strips to keep things even. I’ve never done it that way, but it can’t hurt to try, right?
When you have tied all the strips together, you’re done!
This is such a fun and easy craft. I’ve made tons of them and have even had special requests. You can easily adapt the size to make pillows (tie 3 sides, insert pillow form, tie remaining side). I even made a tiny little snuggle blankie for my daughter using some left over scraps.


[…] been keeping myself busy with some reading, using up the pears from our tree, making Hubby a Saints blanket for his football watching, and working on my Halloween project that will soon be featured over at […]
[…] we headed back home and spent the rest of the day relaxing. I finally got Evie’s Tinkerbell Fleece Tie Blanket finished (that was supposed to be a Christmas gift!) and made her a couple more hair bows, though […]
Crystal makes baby blankets, personalized baby blankets, unique baby blankets, crocheted baby blankets, crochet baby blankets, baby security blankets, round crochet baby blankets and homemade baby blankets