Nearly two years ago, when my daughter was growing in my belly, I thought it would be a great idea to buy some of those pre-cut wooden letters to decorate the kids’ room with. Since the two would be sharing a room, I was trying to come up with some fun ideas that would give them each something of their own in the room. I think I searched all over town before I finally found all the right letters for both of their names. Unfortunately, they ended up being slightly different sizes and styles. The letters have been sitting on a shelf now for well over a year just waiting to be painted.
A week or so ago, I finally got them out to paint. When Zach saw what I was doing he wanted to help too. I let him do the first coat of paint, then I did a second coat to cover up any splotches.
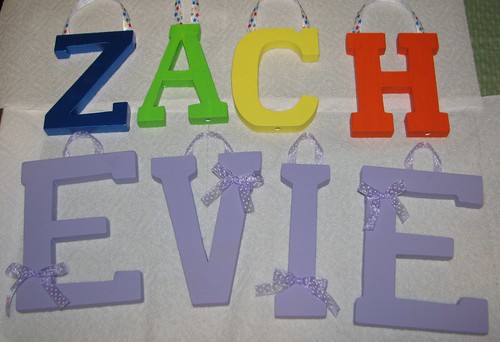
I had really grand ideas of how I was going to paint these. Evie’s were supposed to have flowers and butterfly designs painted on. With Zach’s I wasn’t sure, but I figured I would come up with some kind of design to decorate them with. As you can see, I did none of that. To save time, I just went with solid colors. Since I did Evie’s all in the same color, I used a little bit of ribbon to tie some bows for decoration.
They weren’t at all what I had in mind when I started out, but they’ll still spruce up the room a little.
I have seen (and want to do) the letters with Some nice Scrapbook paper hodge podged to the top surface. they used a few different patterns of paper to match the room, I really liked it. Of course by the time I get around to it- my kids will be in highschool :O)!
If you still want to add a bit of flair to your sons name you can always add those small pre-made flat wooden decorations to it in cars or trucks or animals. My aunt did that and he loved looking at his name with animals on it! Great job on them thought! They look fab!